Monday, September 26, 2011

Making a Mia


Mia has finally stopped having a sleep in the middle of the day. I guess I have done pretty well, she is over 3! I have vowed that on the days she isn't at preschool I will make an effort to do something fun and educational with her while Ellie sleeps.

Today we made a "Mia". I am sure that most of you have drawn around someone in chalk before and coloured them in, well we did a variation on this and decorated the outline with things from the garden. Stones for a face, grass for hair and socks, flowers and leaves for clothes, twigs for hands and flower pots for shoes. Mia was very proud of her "Mia". It was fun spending a half an hour in the sun with her being busy and happy.

Sunday, September 25, 2011

Eton Mess

Here is another fresh garden produce recipe before I have the fresh garden produce. This recipe uses up strawberries or raspberries.

I first ate this desert in the UK, when a relative made it for a family lunch. It was delicious and since then I have seen it made by a lot of trendy British chefs, such as Nigella and Hugh whatever his name is from River Cottage.

It is very simple. All you need is crushed meringues, whipped cream and berries. You may also wish to grate some chocolate on top. Meringues are a great use of excess egg whites and will last for ages in an airtight container.


Mix them all together and serve. Yum!! (We only had chocolate chips!)

Felt Food: Sandwiches

Here is the first of a series of felt food tutorials. I have been wanting to make felt food for a while, and finally did it today. Miss Mia is going to have a surprise toy to come home to from preschool today!

I thought sandwiches would be a good thing to make, because there is actually some roleplay involved in making the sandwich as well as pretending to eat it. I am pretty happy with the results, and with the exception of the bread slices all the pieces were very easy to make, beginner sewers project!

The tomatoes, cheese, ham and lettuce were all made simply by cutting out the shape from felt and then top stitching. The tomato and lettuce are a little but more complicated.


The pita pocket is exactly what it looks like, 2 half circles stitched together to make a pocket.

The bread was a little bit more complicated. Here are the instructions:

1. For each slice of bread you will need 2 rectangles for the outsides of the slices and a long strip for the crust. You may need to sew 2 thin strips together to make it long enough.


2. Pin and sew the "crust" to one of the 2 sides, right sides together. Pin and sew the other side to the crust to make the slice, leaving a gap to put the stuffing into.


3. Turn it the right way out and stuff. Handsew the gap closed.


Now you are ready to make a sandwich!

Saturday, September 24, 2011

Lemon cordial


My plan is that as our garden prospers and I discover delicious recipes to use the produce in, I will share the recipes with you. We don't actually have a fruiting lemon tree, but a while ago someone at Nathan's work left some for people to grab and we had lemons in our fridge that needed using.


As a child I made this lemon cordial recipe. It is so easy that a child can make it and it doesn't involve any cooking. You just need to use a tiny bit and it quenches that thirst for something slightly sweet and tangy when you just feel like a little something more than water. You can keep the concentrate in the fridge and mix up drinks as you need them.


So here is the recipe:


Lemon Cordial


4 lemons


3 c sugar


2 t tartaric acid


2 c boiling water


Peel lemons with a potato peeler and put in a heatproof bowl with lemon juice, sugar and acid. Pour over water and stir to dissolve sugar. Leave to seep and cool. Strain and store in the fridge.

Garden Developments

Yesterday we filled in one of our new raised beds. We were supposed to fill both of them, but it took longer than expected! Thanks to Nathan's parents for the help, equipment and babysitting that allowed us to do it! Here are some pictures of the latest activity in our garden.


This is the new garden, filled with dirt and ready to be planted. Excuse the washing!


These are herbs that I planted. Not a very good picture, but there are lots of herbs including mint, thyme, italian parsley, dill, oregano, sage, lemon balm, coriander and some celery also as well as several transplanted rhubarb plants:


Our strawberries are flowering! My mouth is watering at the thought of the fresh strawberries that they will turn into!


This is our first crop of salad leaves. I love how having a vegetable garden makes kids excited about eating them! Two days in a row Mia wanted to go out and pick leaves (We had to modify it to her holding bowl and Mummy picking because she pulled out a couple of plants!), and then make her own cheese and salad sandwich which she ate all up!

I am really enjoying getting my hands into the dirt!

Thursday, September 22, 2011

Summer Tank Top Tutorial


After trial and error (this started off as a top for me, but I made it too big, then too small, then it became a top for Mia!) I have figured out a tutorial for this top that works for child or adult! So here goes:

You will need:
A metre of fabric for an adult, less for a child
Matching thread
1cm wide elastic

1. Measure whoever the top is for. You will need 2 measurements. Around the hips and from underarm to hip.

2. Cut out your fabric. You will need 2 squares that measure

Half of hip measurement plus 10cms (child) or 20 cms (adult) and measurement from underarm to hip plus 5cms

e.g: If you are making it for a child that is 64cms around the hip and 30cms from underarm to hip, each of your squares (or rectangles if you want to be picky) will be 42cm x 35cms.

You will also need 2 straps that are 4cms by enough length to hold the top up.

3. Sew your 2 squares together, right sides together, on both sides.

4. Fold under and press 2cms at the bottom (hem) and 3cms at the top (for elastic). You will either need to overlock edges to stop fraying or fold under a little bit so raw edge isn't exposed.

5. Sew these, leaving a gap in the top to insert elastic.

6. Put elastic around chest under arms and cut so that it is firm but not so tight it is uncomfortable.

7. Insert elastic and stitch ends together and stitch where you have inserted it closed.

8. Overlock edges of straps. Fold in 3, press, and top stitch to hold it together. Pin these to underside of top in correct place to hold top up, with overlocked edges to bottom. Stitch 2 lines of stitching on either end of both straps to hold it in place.


All done! Wasn't that easy! Now wait for some sun to wear it in!

Wednesday, September 21, 2011

Summer Outfit


With summer approaching I am trying to make some cute outfits for my girls. Today I produced this. I am pretty happy with it, as is Miss Mia. Even though it is freezing she refuses to take it off!

With the shorts I used a pattern from an Ottobre, a very basic pair of shorts and modified it using this tutorial . The top I made up myself, tutorial following. It was very simple, showcasing the cute fabric that I got in a Spotlight sale. The whole outfit was very simple to make.


Now we need some nice weather so she can wear it outside of the lounge with the heatpump on!

Motherload of Fabric!


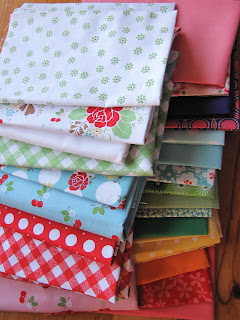
A couple of weeks ago my mother and I ordered a huge amount of quilting fabric to make things for Ellie and my sister's baby (due in early December) from the US. It arrived on Mum's doorstep yesterday and both of us are VERY excited about it!

What do we plan to do with it?

Mum is going to make quilts for our wee girls. This is the one I have picked for Ellie in her rainbow themed room:


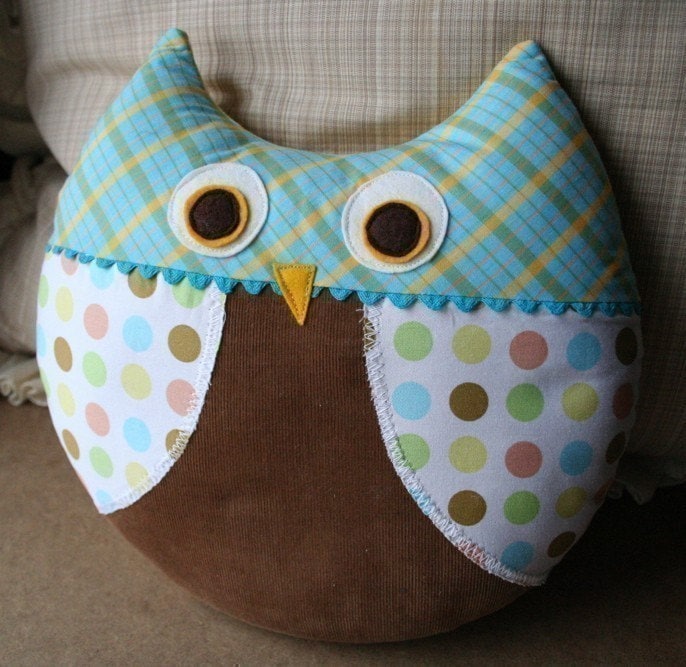
Then I am going to make cushions and bunting to go with the quilts. Some ideas:


Check out my pinterest board http://pinterest.com/sara_speight/for-the-home/ for more.

Very excited about these projects and what the rooms will look like at the end! My husband is laughing at me!

Monday, September 19, 2011

Baking and a recipe

I love to bake! It is such an engrained part of my life that my family pretty much always has baked goods in the cupboard, and often extra in the freezer. To many of my friends this seems to be an extraordinary acheivement, but it is just something I do at least once a week without fail. I love to have friends over for coffee and some baking, and enjoy giving baking to people to enjoy in their own homes for special occasions such as the arrival of a new baby.


With both my baking and other forms of cooking I don't really do gourmet. You wouldn't find me on one of those cooking shows making amazing looking dishes with duck or cavier. I think it is more challenging to make good healthy food that tastes delicious, doesn't cost much and acknowledges the seasons.


I think my upbringing has had a huge influence on my outlook on this. My mother always (and still does) baked for us. I have childhood memories of being about 4 and stirring icing for slices in whatever colour of the rainbow we desired. I also grew up on an orchard and we always had a vegetable garden, fruit trees and often home raised meat or eggs. As an adult I realise now that not all my friends had the luxury of an upbringing that bred into them an understanding of healthy home cooking.


At the moment I have sick kids and was watching Oprah yesterday between dealing with snot and tantrums! They were doing an article on being more aware of where your food came from. One journalist was saying that basically diabetes, heart disease etc is a problem of the last few generations and that we should only eat what our great grand parents recognised as food. If we did this and didn't eat too much of it we would be fine. This really appealed to me, and perhaps explains why none of my family is overweight but that I still eat baking each day (and good genes too thanks Mum and Dad!)


Anyway, enough about my views on nutrition! Here is the recipe I cooked this week. Ignore the butter and take notice of the rolled oats if you are concerned about the nutritional value of these! They helped my feel better while dealing with my 2 these last few days anyway!


Chocolate Chunk Oat Cookies


250g butter (softened)


3 T sweetened condensed milk


3/4 c sugar


1 1/2 c flour


1 1/2 c rolled oats


1 t baking powder


200g chocolate bits or chopped chocolate (I used half dark and half white)


Preheat oven to 180 C. Grease 2 trays.


Beat butter, sugar and condensed milk until fluffy and light coloured. Add rest of ingredients and fold in.


Place large tea spoon fuls on the oven trays and flatten with a fork. Bake for 18 - 20 mins. Enjoy!


Sunday, September 18, 2011

3 star Michelin Baby Food Chef!

It never ceases to amaze me how many of my Mummy friends buy copius amounts of baby food. The reasons it surprises me are:

(a) Its expensive
(b) It tastes AWFUL especially the savoury stuff
(c) It is so easy to make your own
(d) Home made is better for your baby

I can't say I have never bought a tin of baby food, when we are travelling or out and about a lot I have resorted to the stuff in a jar, although I generally try to stick with the organic varieties.

I have had both ends of the appetite and fussiness sprectrums with my girls. Mia was (and still is) picky with her food. She wasn't really interested until she was about 8 months and would turn up her nose at my carefully prepared varieties of baby food. Ellie on the other hand seems to eat anything I serve up (so far), although she is currently going through an octopus stage where she has to try and grab everything so a lot of food ends up everywhere except in her mouth!

Making your own food seems such a simple concept to me. You need some fruit and veges (and later on dairy, meat and grains), a stick blender and some ice cube or muffin trays, and a pot of course. Chuck your ingredients in the pot with some water. Boil until really soft and then blend it and freeze it. Heat it in the microwave when you want it and voile! Start with simple root veges and fruit, and then get more complicated. Once its heated add some breast milk or water and rice cereal to take it to the desired consistency.

Ellie is 6 and a half months so what she can eat is expanding. Over the weekend I had a big cook up and here are some of my creations:

Mouse traps for chewing on. Neither or my girls have been that interested in bought rusks but marmite is a hit so these are slices of bread with marmite and cheese on them cooked very slowly to make them hard. Ellie loves them at the moment.


3 varieties of baby food:
1. Stewed pears and apples and also some prunes as Ellie sometimes needs a litte help in the number 2s department!

2. 2 varieties of lamb food. Lamb, kumara, lentils, carrot and date. Lamb, pasta, kumara and zucchini.

3. "Fish pie": Fish, potato, kumara, zucchini and a little bit of cheese.


If you are a big time buyer of commercial baby food, I challenge you to make your own!

Saturday, September 17, 2011

Blog resolution and School Fair

My cousin Holly and I have made a pact to add to our blogs at least 5 times a week. Even if nobody else reads them we read each others, and with little kids we need something rewarding for ourselves in our lives! So now I have to think of some things to blog about!


Last weekend my parents were down our way. We decided to go to a local rural school's "School Fair". I grew up in a rural area myself, and I miss that aspect of my current suburban existance. If I had my way my family would go completely feral and live on some land in the middle of nowhere and raise pigs and chickens, but land costs money and you need a job to get money, so that won't be happening any time soon! My sister also came and took Quinn my nephew.


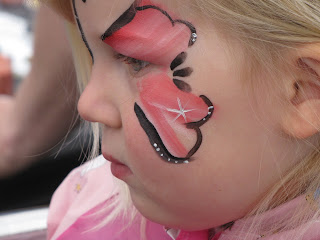
The kids (and the adults) had a great time! There was fudge and sausage sizzles, 50 cent books and $5 bags of clothes, bric-a-brac, toffee apples and balloons. Mia especially enjoyed getting her face painted and riding a pony.


Quinn enjoyed the petting zoo.


There were 21st century twists to the Fair, a cafe and organic veges for sale. And we only spent $11! And Nathan got his fudge and sausage, which he had been excited about all week.

Friday, September 16, 2011

Traffic Pants


My nephew Quinn is 2 next month and I wanted to make him an outfit. I'm usually not very interested in sewing for boys, I have 2 girls of my own and boys clothes just seem so boring compared to pretty girls clothes! I had great fun sewing these though! They were from the summer ottobre. I loved putting all the road sign applique on them, and am pretty proud of the result!


I also love the little double pocket for putting cars in on the side (unfortunately all our small collection of toy cars were too big to fit in them!). I am convinced that not all boys clothes are boring now!


Thursday, September 15, 2011

Projects I (unrealistically!) want to get done by Xmas

I have been composing an ever growing list of projects I would like to get done before Xmas. We will see how I go! Just in case you want inspiration:


1. Traffic Pants and T-shirt for my nephew Qinn from summer edition of ottobre


2. Cuffed or knotted denium shorts for my girls


3. Ruffly singlets for my girls and I


4. Tie strap tops for us all


5. 6 colouring bags for Xmas and birthday presents (Caleb, Renee, Sienna, Quinn, Ollie and Lizzy)


7. Peasant dresses for my girls

8. Linen teatowels with native birds freezer paper stenciled on for my Grandmother

9. Rompers for Mia, Ellie and Lucy and Rose (twins) for their 1st birthday

10. Sock Monkeys for Luca and Ellie

11. Cushions and Bunting for Erin's buba and Ellie (my mother is going to make Ellie this quilt)

12. Dolls clothes for Mia and Skye

13. Xmas decorations for us and gifts

14. Felt food for Mia and Niko

15. Reversible sunhat for Ellie

16. Pillowcase travel bag for Emma

17. Light cardy for Mia (probably Ottobre for this again!)

18. Maxi dress for me (if I can find a cheap vintage sheet or source of fabric!)

19. Button front skirt from a man's shirt for me

20. Tag blankets for Erin's buba and Archie

21. Dresses for Mia and I from my old pattern collection

22. Ruffle bum leggings for Ellie and E's baby

Lets see how far I can get through the list. I've almost finished the first!

Monday, September 12, 2011

Spring in the garden

As you can tell from the "Four seasons in one day" weather we have had for the last few days, spring is here! I have planned to enlarge our vege garden since last summer, when it was neglected and left to grow weeds due to the fact I was heavily pregnant with E! Nathan and I have bothe been busy. He has been building 2 new beds which are now ready to be dug down and lined and filled with soil and compost. As we live so close to the beach our garden is basically sand, and if we want to grow anything we have to ship the soil in!


I have been busy planting plants and seeds and so far I am very pleased with how the garden progresses. As the weather improves I plan to enlarge the range that is growing in our garden, and I really want to try to grow almost all our vegetable needs over the summer and autumn months.


Last autumn Mia and I planted daffodils. It was really easy and it makes me feel so good to look out the window at their beautiful white and yellow heads and know that spring is here and the weather is improving!

Pimp my buggy!


Mia has a dolls' stroller since she could walk. It is a very cheap one and for most of its life the thin nylon cover has been ripped, forcing the doll sitting in it to sit on a very strange angle, and upsetting Miss OCD who cannot handle things not "being right". One day last week it was causing particular concern. My first thought was "We should get her a new one", then I thought "I can make a new cover!". After bribing her into cooperating and having a nap with the promise that I would have a new buggy cover for her when she woke up I used the old one as a pattern to cut out a new one. The whole process probably only took about 45 mins and it is (I think!) much cooler than the old one and much better quality. Mia and "Buba" were very happy with the result. The moral or that story is don't throw it away if you can fix it!

Friday, September 2, 2011

Hair clip card


To go with the birthday girls dress I wanted to make a card. I had some yoyos and buttons lying round, so I sewed these onto hairclips. I then cut small slits in a plain white card so that I could poke the yoyos through with the clips on the inside. I then made the yoyos look like flowers by using a felt pen to draw stems and leaves. I think this will now be my card of choice for little girls!

Double bows and ruffles


The first of the second antenatal babies (if that makes sense!) had her first birthday party today. I wanted to sew all the second babies (who are mostly girls) something special to show that they are just as special as our firsts. I decided on a pattern in the Summer 2011 Ottobre and started to make it from some cute link pink seersucker material. Only issue was it was a bit small, so Ellie gets that one! So then I had to sew another dress and pants set in blue broderie anglaise for the birthday girl!


I am pretty proud of them! They are fully lined and the ruffles are so cute!