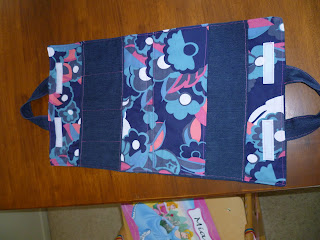
While wasting time on pinterest, I came across some pictures of art folders for kids and thought "what a great gift". I played around with a proto-type for Mia, and improved on it from there. I think this will be one of my "go to" presents for kiddlies for the next year or so until they have one each! Here is how I made it. You will need:
- 2 fabrics (for inside and outside and pockets) it is a good idea to use at least one that is quite stiff eg: denium. Alternatively you could iron on interfacing to stiffen it
- velcro
- Double sided iron on stuff (forgot what it was called) for applique on front
- Thread and a machine etc
What you need to cut out:
- A piece from each type of fabric measuring 35 x 60cms (interior and exterior)
- 2 handles measuring 25 x 10cms
- 1 pocket measuring 35 x 22cms from exterior fabric
- 1 pocket measuring 35 x 15cms from exterior fabric
- 1 pocket measuring 35 x 15cms from interior fabric
Iron them all to make them nice and flat.
How to make it:
- Work out half way both vertically and horizontally so you put the applique in the right place (I learnt from my first try!) Adhere whatever applique you choose to use to the front of the exterior piece of fabric. Sew it on.
- Fold a cm under each long side of each pocket and iron. Hem one ironed side of each.
- Work out half way of the interior (the bit that will fold it into a suitcase) so that you put the pockets in the correct place. Stitch the exterior fabric smaller pocket to one side of the interior. Stitch close to the side, as this is just basting and will hold the pocket in place until you sew the interior and exterior together. Sew lines on this pocket, to make "mini-pockets" to put crayons and other treasures in.
- Place the 2 remaining pockets together, with the smaller pocket on top of the larger one. Overlap the ironed under bit at the bottom. Sew this onto the other side of the interior fabric, very close to the centre line.
- Sew the long side of the handles, and turn them the right way out. Iron these. You can top stitch them close to the edges if you want to make it look pretty.
- Pin the exterior and interiors together, right sides together. Also pin the handles on, making sure that they are sandwiched between the two layers and pointing inwards. Make sure you centre the handles (again learnt the hard way!) Sew right around the outside, leaving a small hole between the 2 ends of one handle so you can turn it the right way out.
- Turn your art case the right way out.
- Sew right around the outside of the whole case, close to the edge to make it look nice! Also sew along the "fold" where the case will close.
- Sew on 3 8cm pieces of velcro on each inside edge, on either end and in the middle. Be very careful to ensure that these match so that the case can be closed.
- Fill it with crayons and some paper or a colouring book and you have a gift!

No comments:
Post a Comment